CreateForLess Project: Retro Christmas

I’m over at the CreateForLess blog today with this fun and festive card using lots of Tim Holtz/Sizzix products. You can see the post HERE for the full tutorial.

SUPPLIES:

The following list contains affiliate links which means if you click on a product thumbnail, and make a purchase, I may receive a small commission at no cost to you.  As an Amazon Associate I earn from qualifying purchases. My full disclosure policy can be found HERE). 

Holiday Greetings stamp set–Tim Holtz

Ornamental Birds die set-Tim Holtz/Sizzix

Back to the 80s

Roller rinks were an 80s staple and bring back so many fun memories. When I saw Catherine Pooler’s latest release, Forever 13, I knew those skates needed to be in my craft room!

For this project, I created an ink blended background on top of the adorable heat embossed background stamp in fun 80s colors. The skates definitely needed to be purple and sparkly. I have a video HERE that shows how this project came together.

Supplies:

This list contains affiliate links which means if you click on a product link, and make a purchase, I may receive a small commission at no cost to you.  As an Amazon Associate I earn from qualifying purchases. My full disclosure policy can be found HERE). 

Let the Good Times Roll stamp set

At the Rink background stamp

Distress Oxide: Squeezed Lemonade, Mustard Seed, Spiced Marmalade, Ripe Persimmon

Spectrum Noir Sparkle Pen

Nuvo Drops Crushed Grape

Taylored Expressions Masking Stencils-Square

Wendy Vecchi Make Art Stay-tion

CutCardstock Design Team Project: Wonderful Christmas

Hi Everyone!

Christmas crafting is so much more fun with new supplies–would you agree? :). For my most recent CutCardstock design team project, I got to break out my Hero Arts October My Monthly Hero kit and it’s a good one!–All retro Christmas–my favorite!

The following post contains affiliate links which means if you click on a product link, and make a purchase, I may receive a small commission at no cost to you.  My full disclosure policy can be found HERE). 

For my card stock, I used a Cougar White folded note card as my base and Gamma Green Astrobright card stock for my front panel. Gamma Green is such a great Christmas-y green.

I first heat embossed my green panel using Hero Arts White Embossing Powder along with the new Mod Pattern Bold Prints background stamp.

Then I layered a few die cuts from the Pop Art Fancy Dies using Cougar Super Smooth White and Pop Tone Wild Cherry card stock.

I added some more stamped images using Retro Christmas Images to complete the card.

That bright red and green with the retro stamps and die cuts is so cheerful and fun. Thanks so much for joining me today and I hope your holiday crafting is off to a great start!

CutCardstock Design Team Project: Retro Vases

cc vases

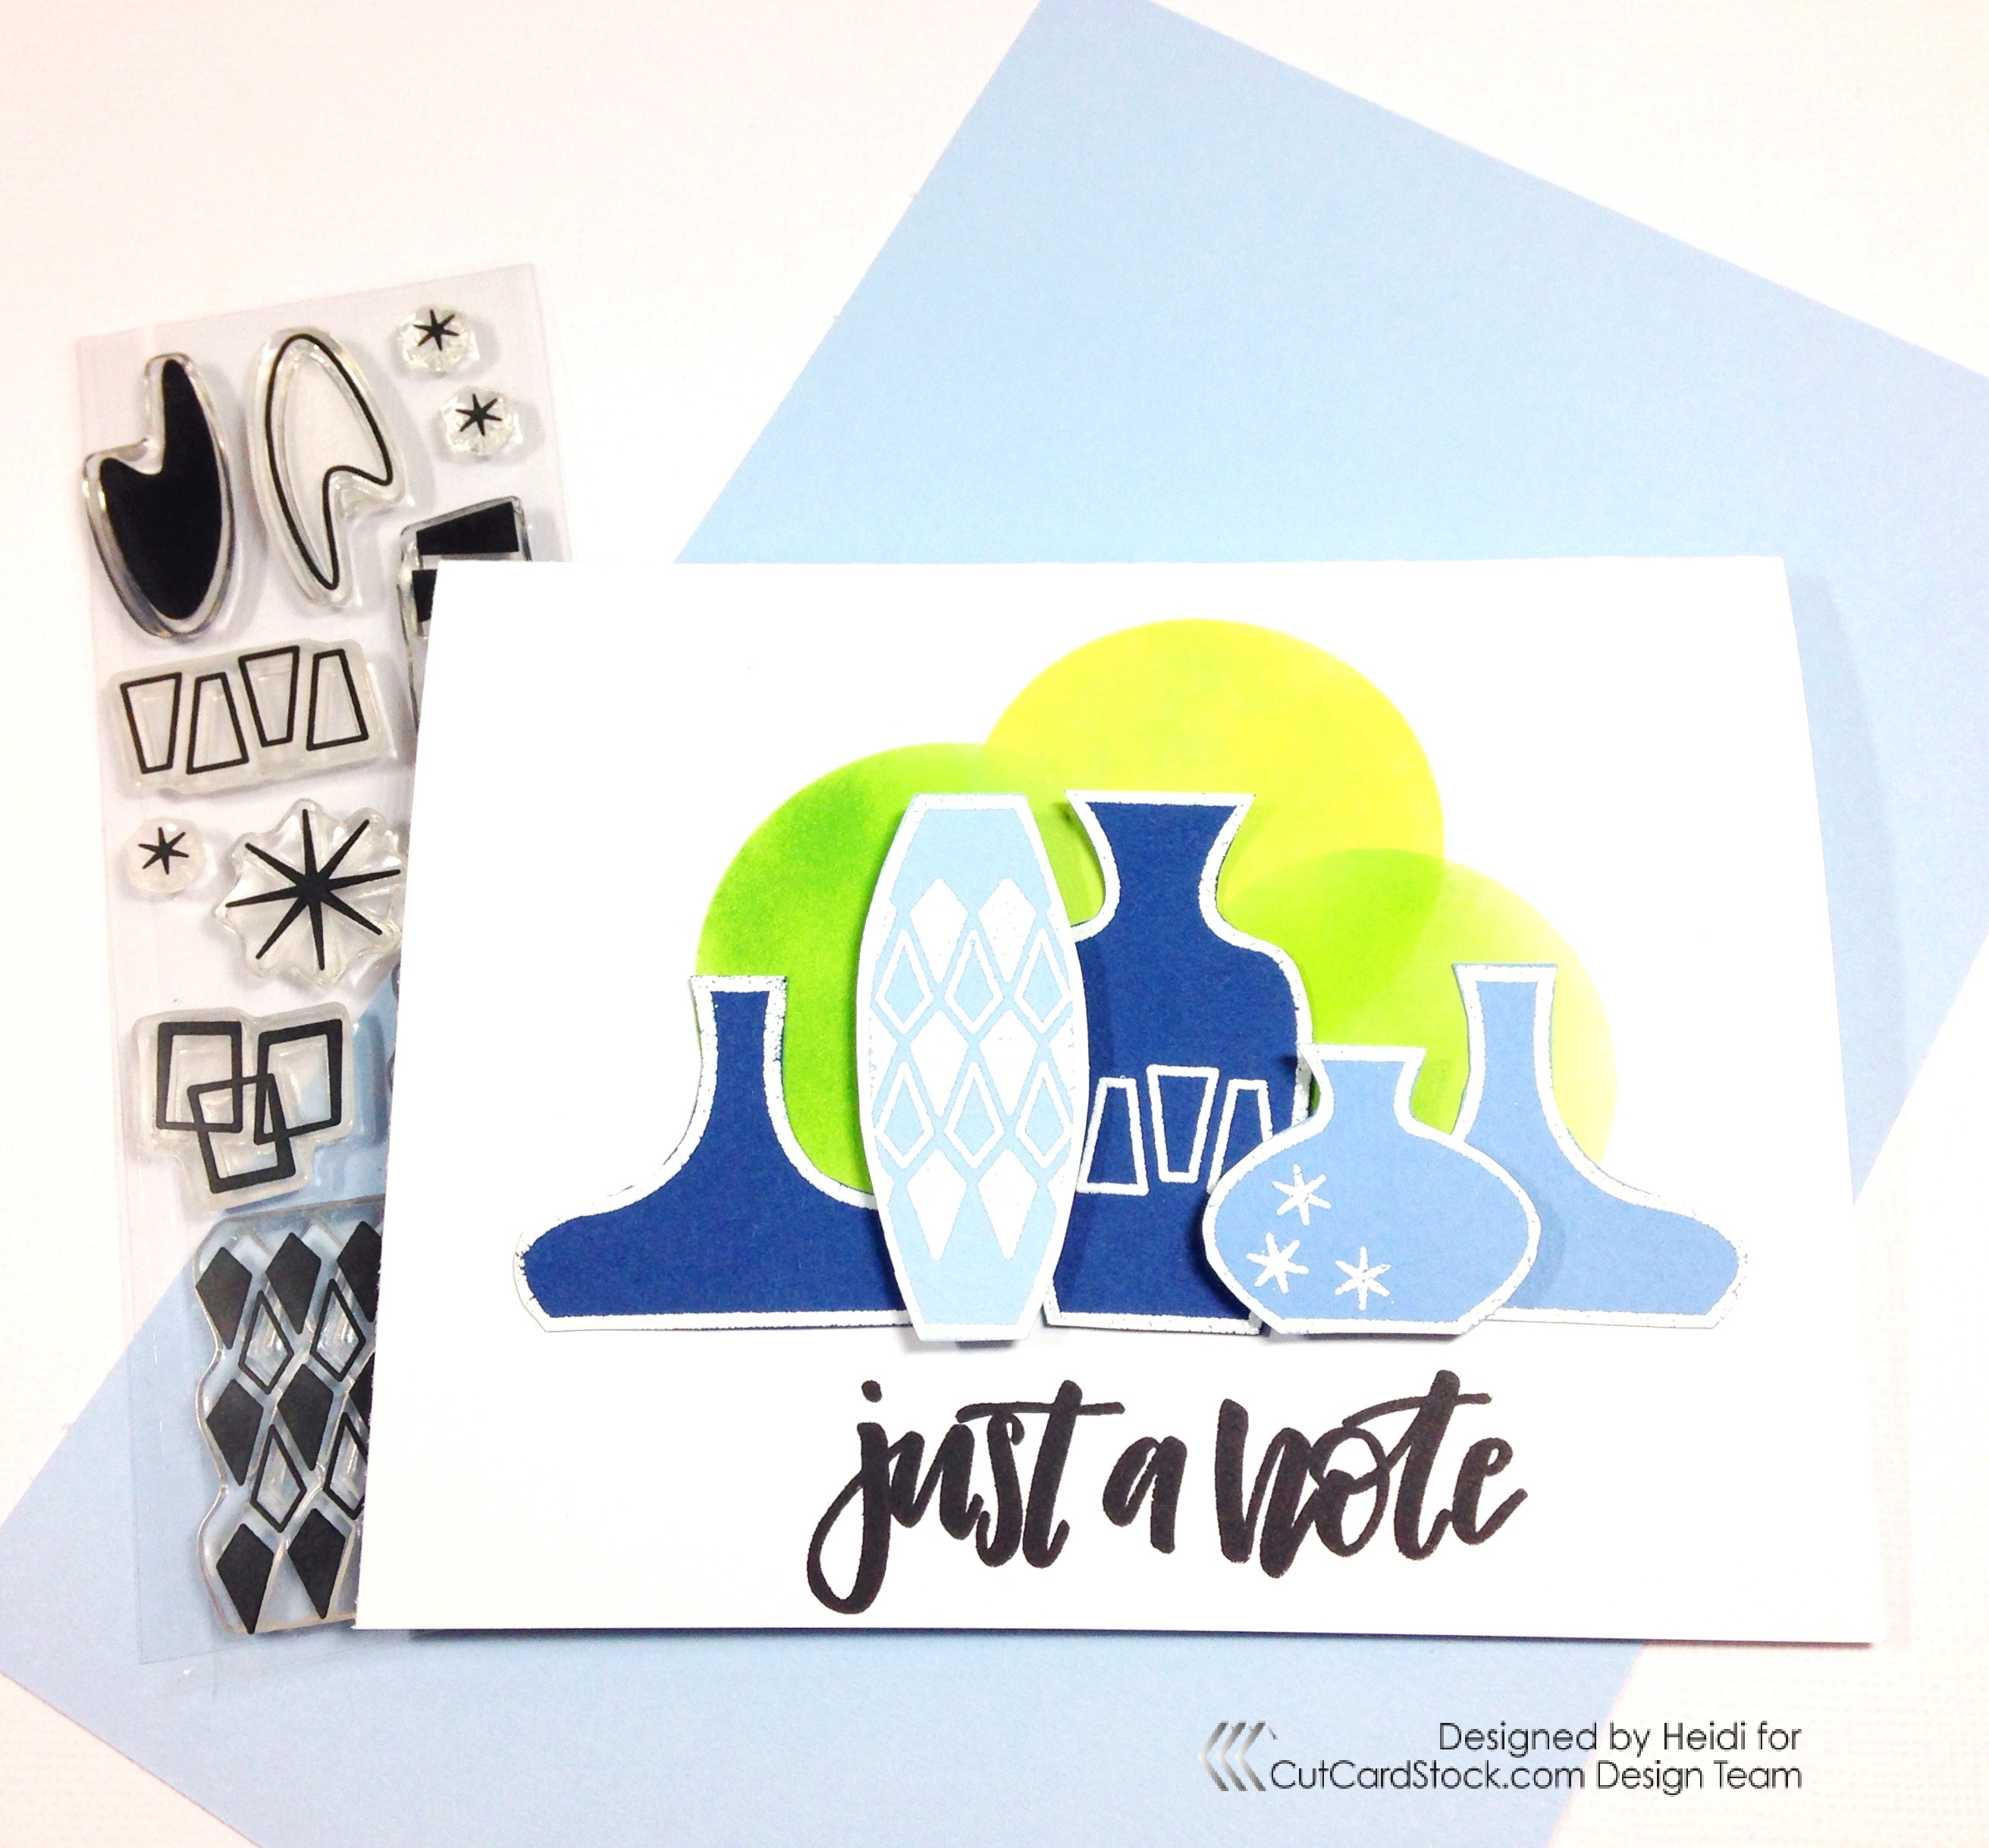
Retro designs are such a fun way to add some flair to a clean and simple card.  For my CutCardstock design team project, I added fun starbursts and geometric shapes to some plain vase stamps I had in my collection.  I used Basis card stock in a variety of pretty blues as my color palette.

The following post contains affiliate links which means if you click on a product link, and make a purchase, I may receive a small commission at no cost to you.  My full disclosure policy can be found HERE).  

IMG_5529

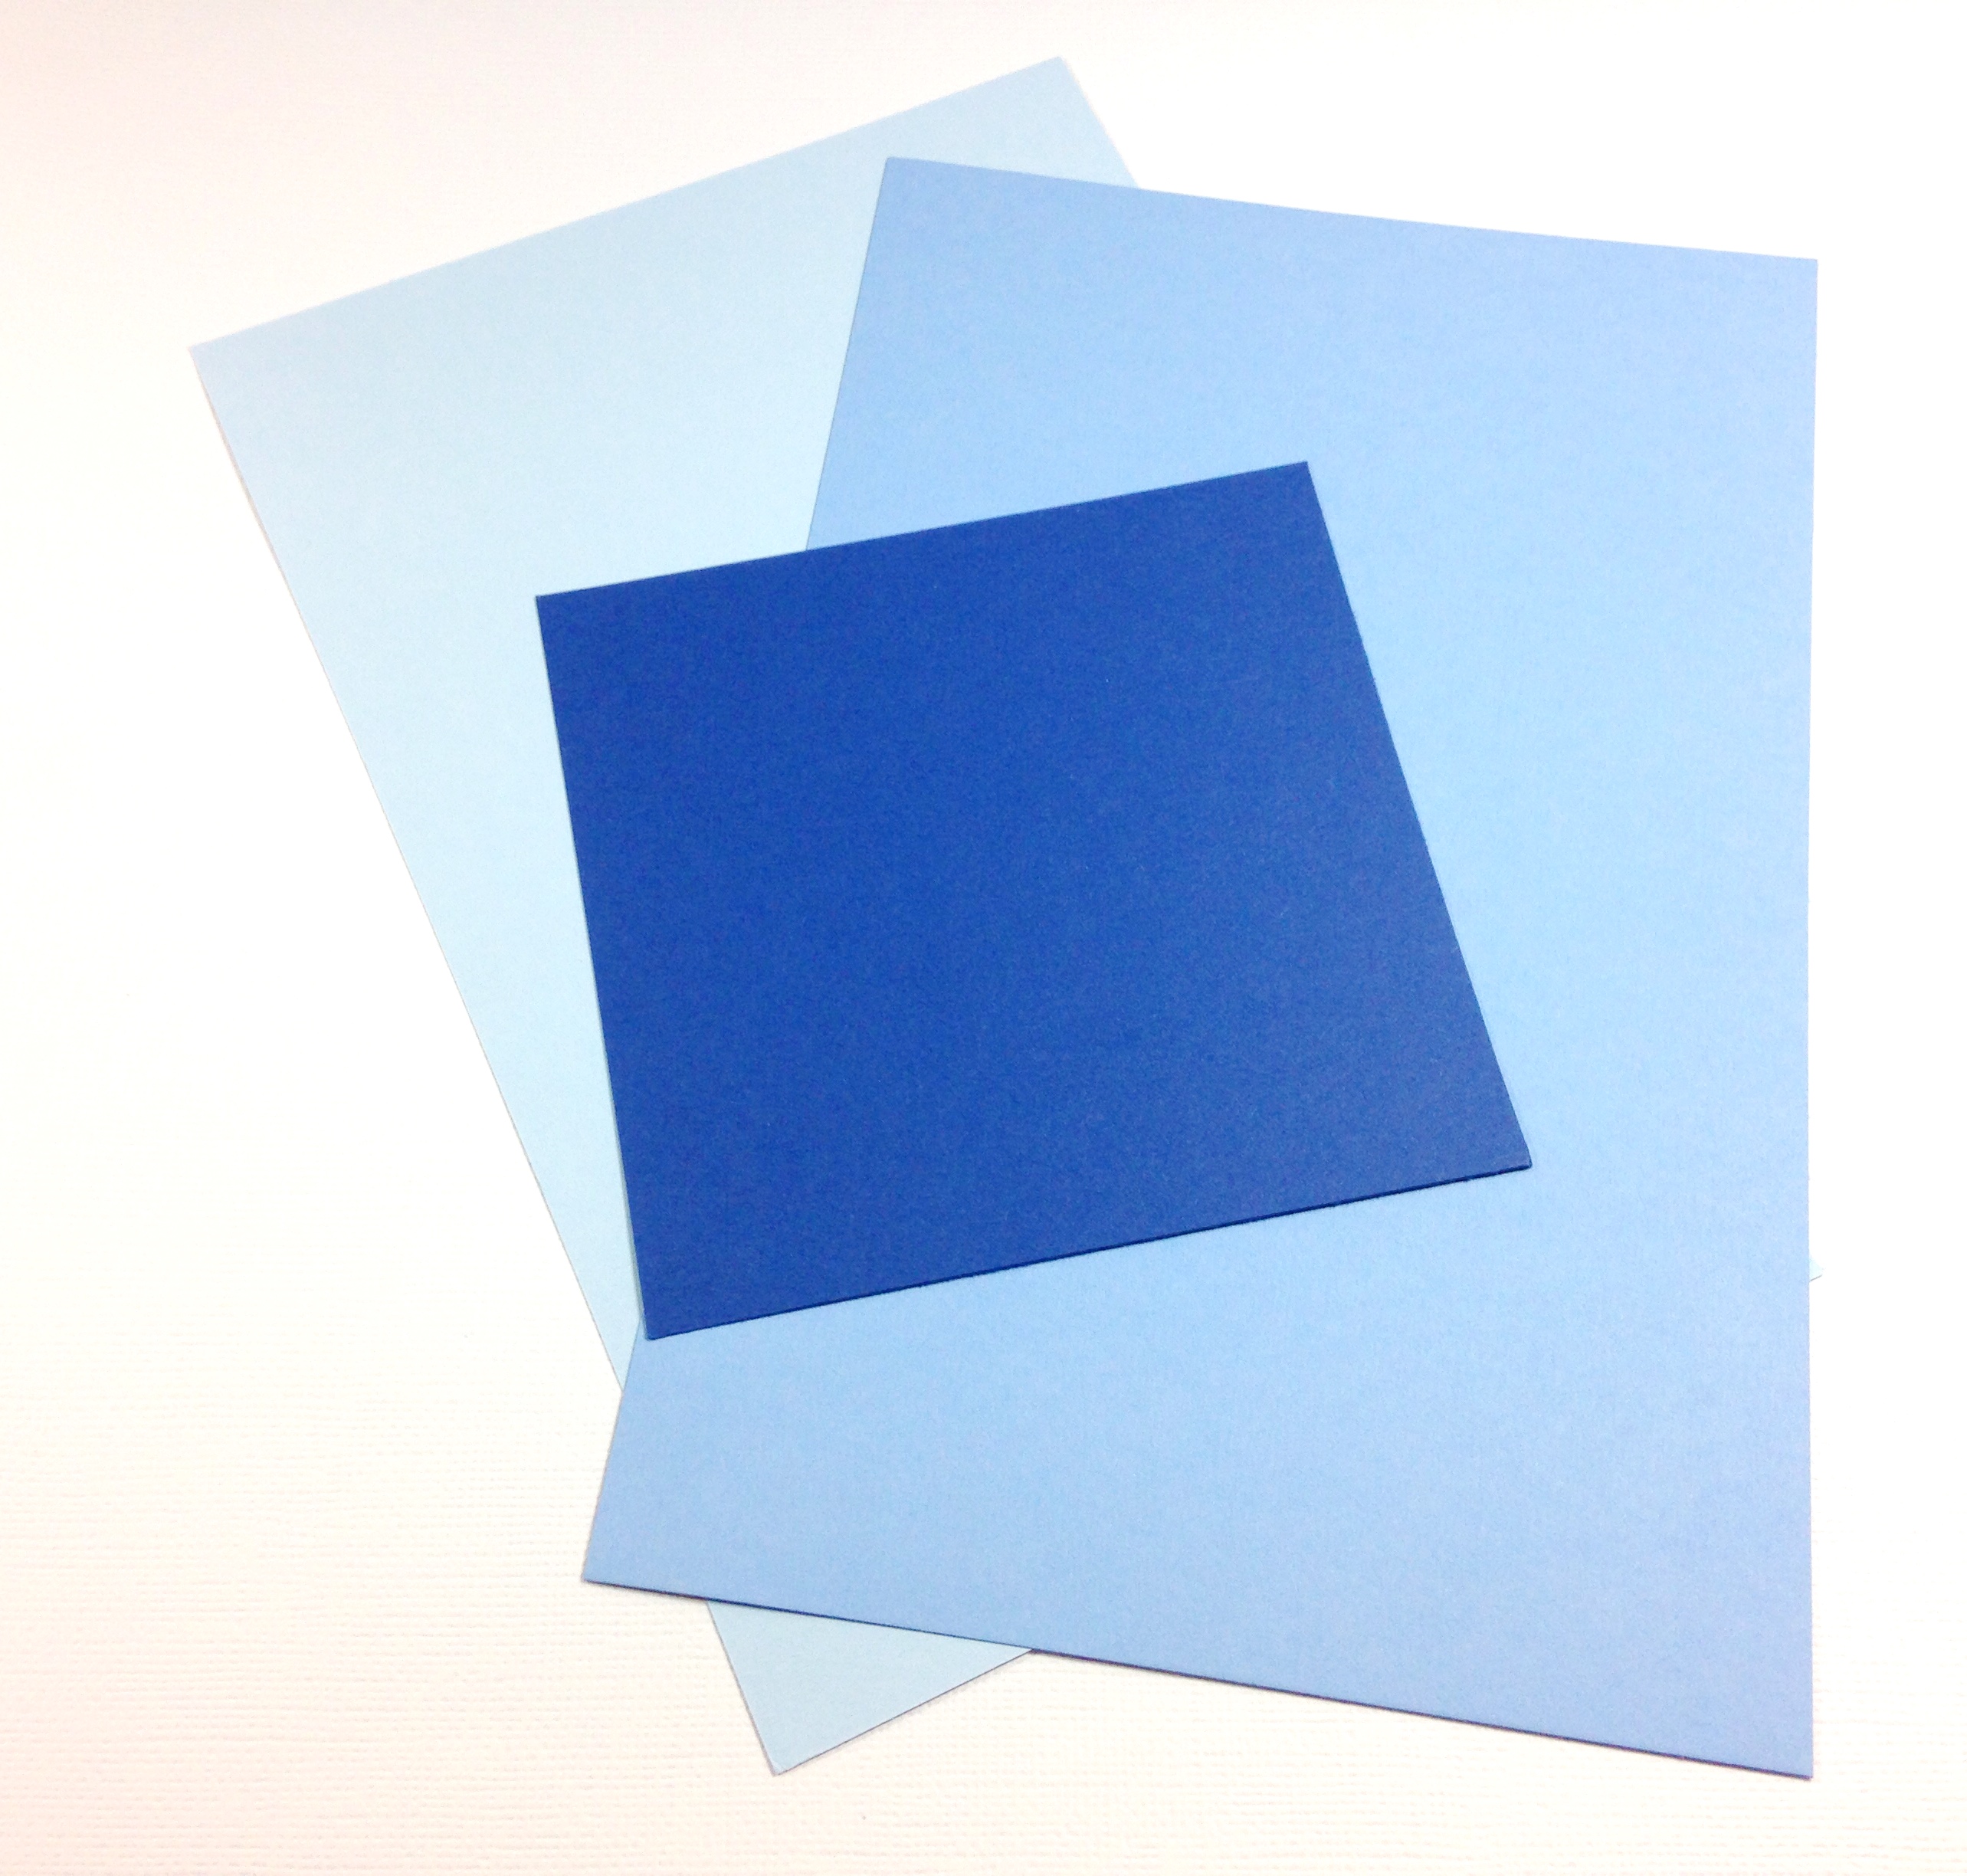
Finding the “perfect” blue card stock can be a challenge.  I found that the Basis card stocks in BlueMedium Blue and Light Blue are very nice “true blue” colors.

IMG_5531

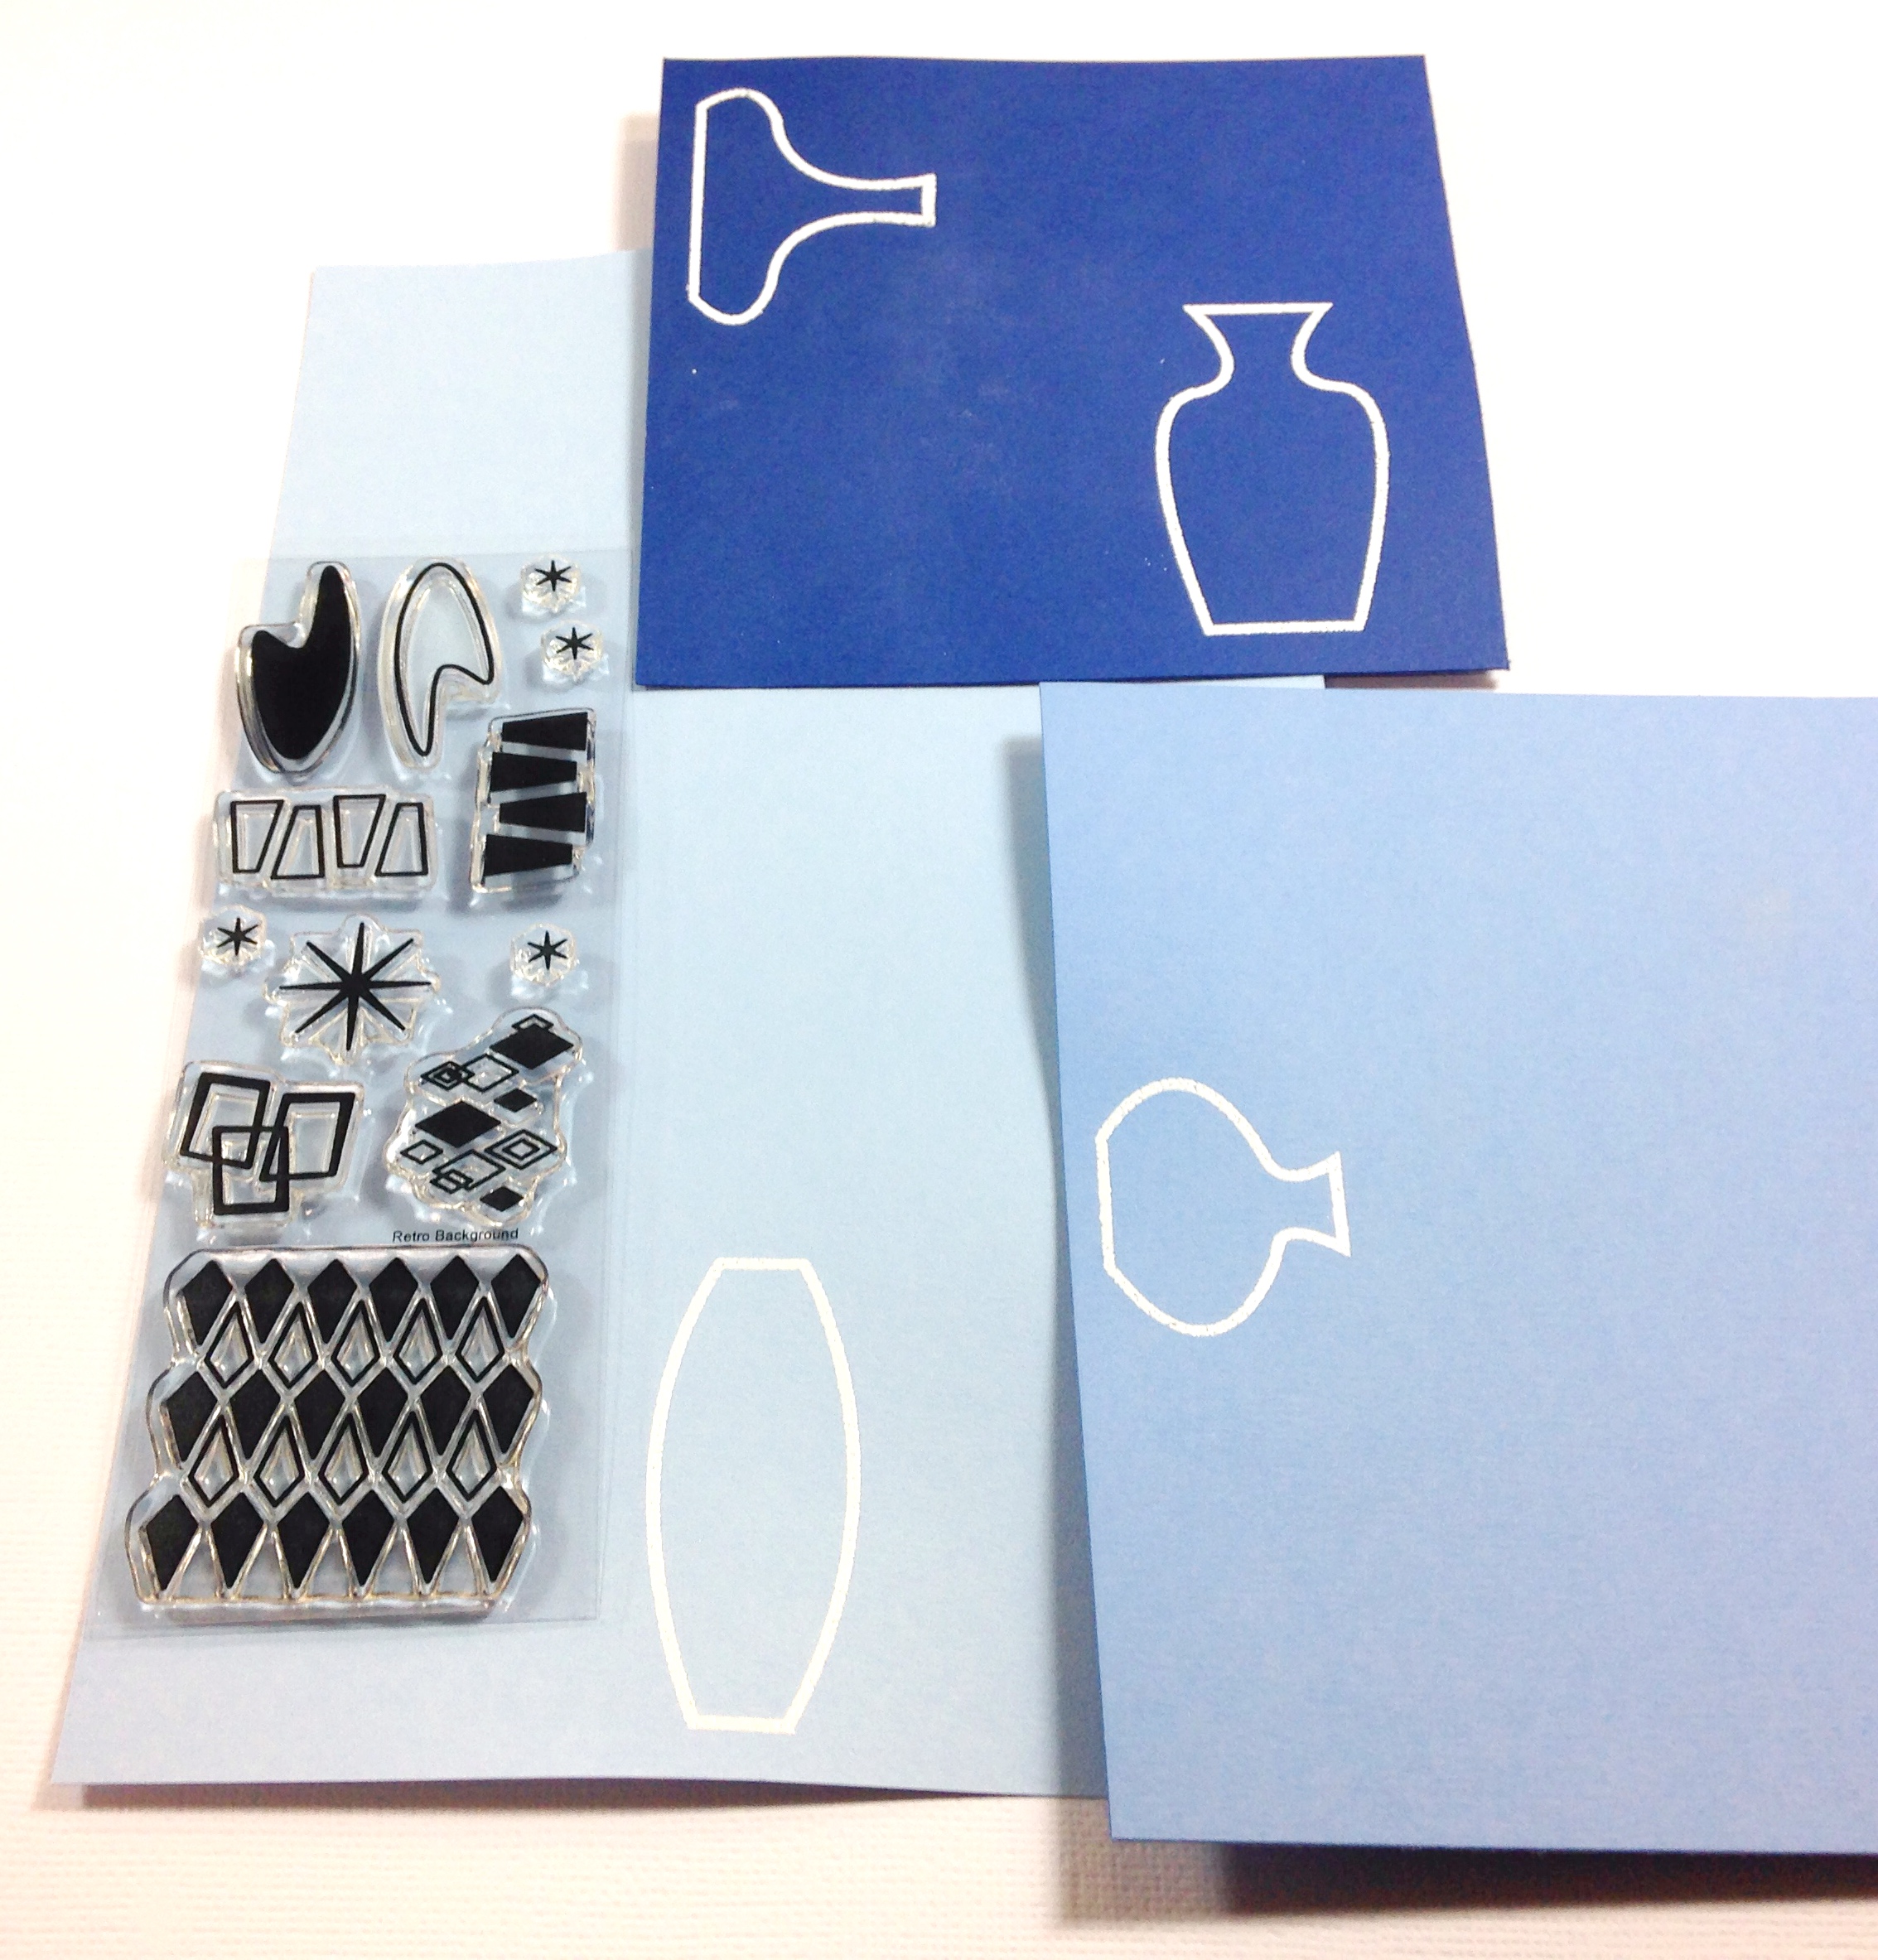
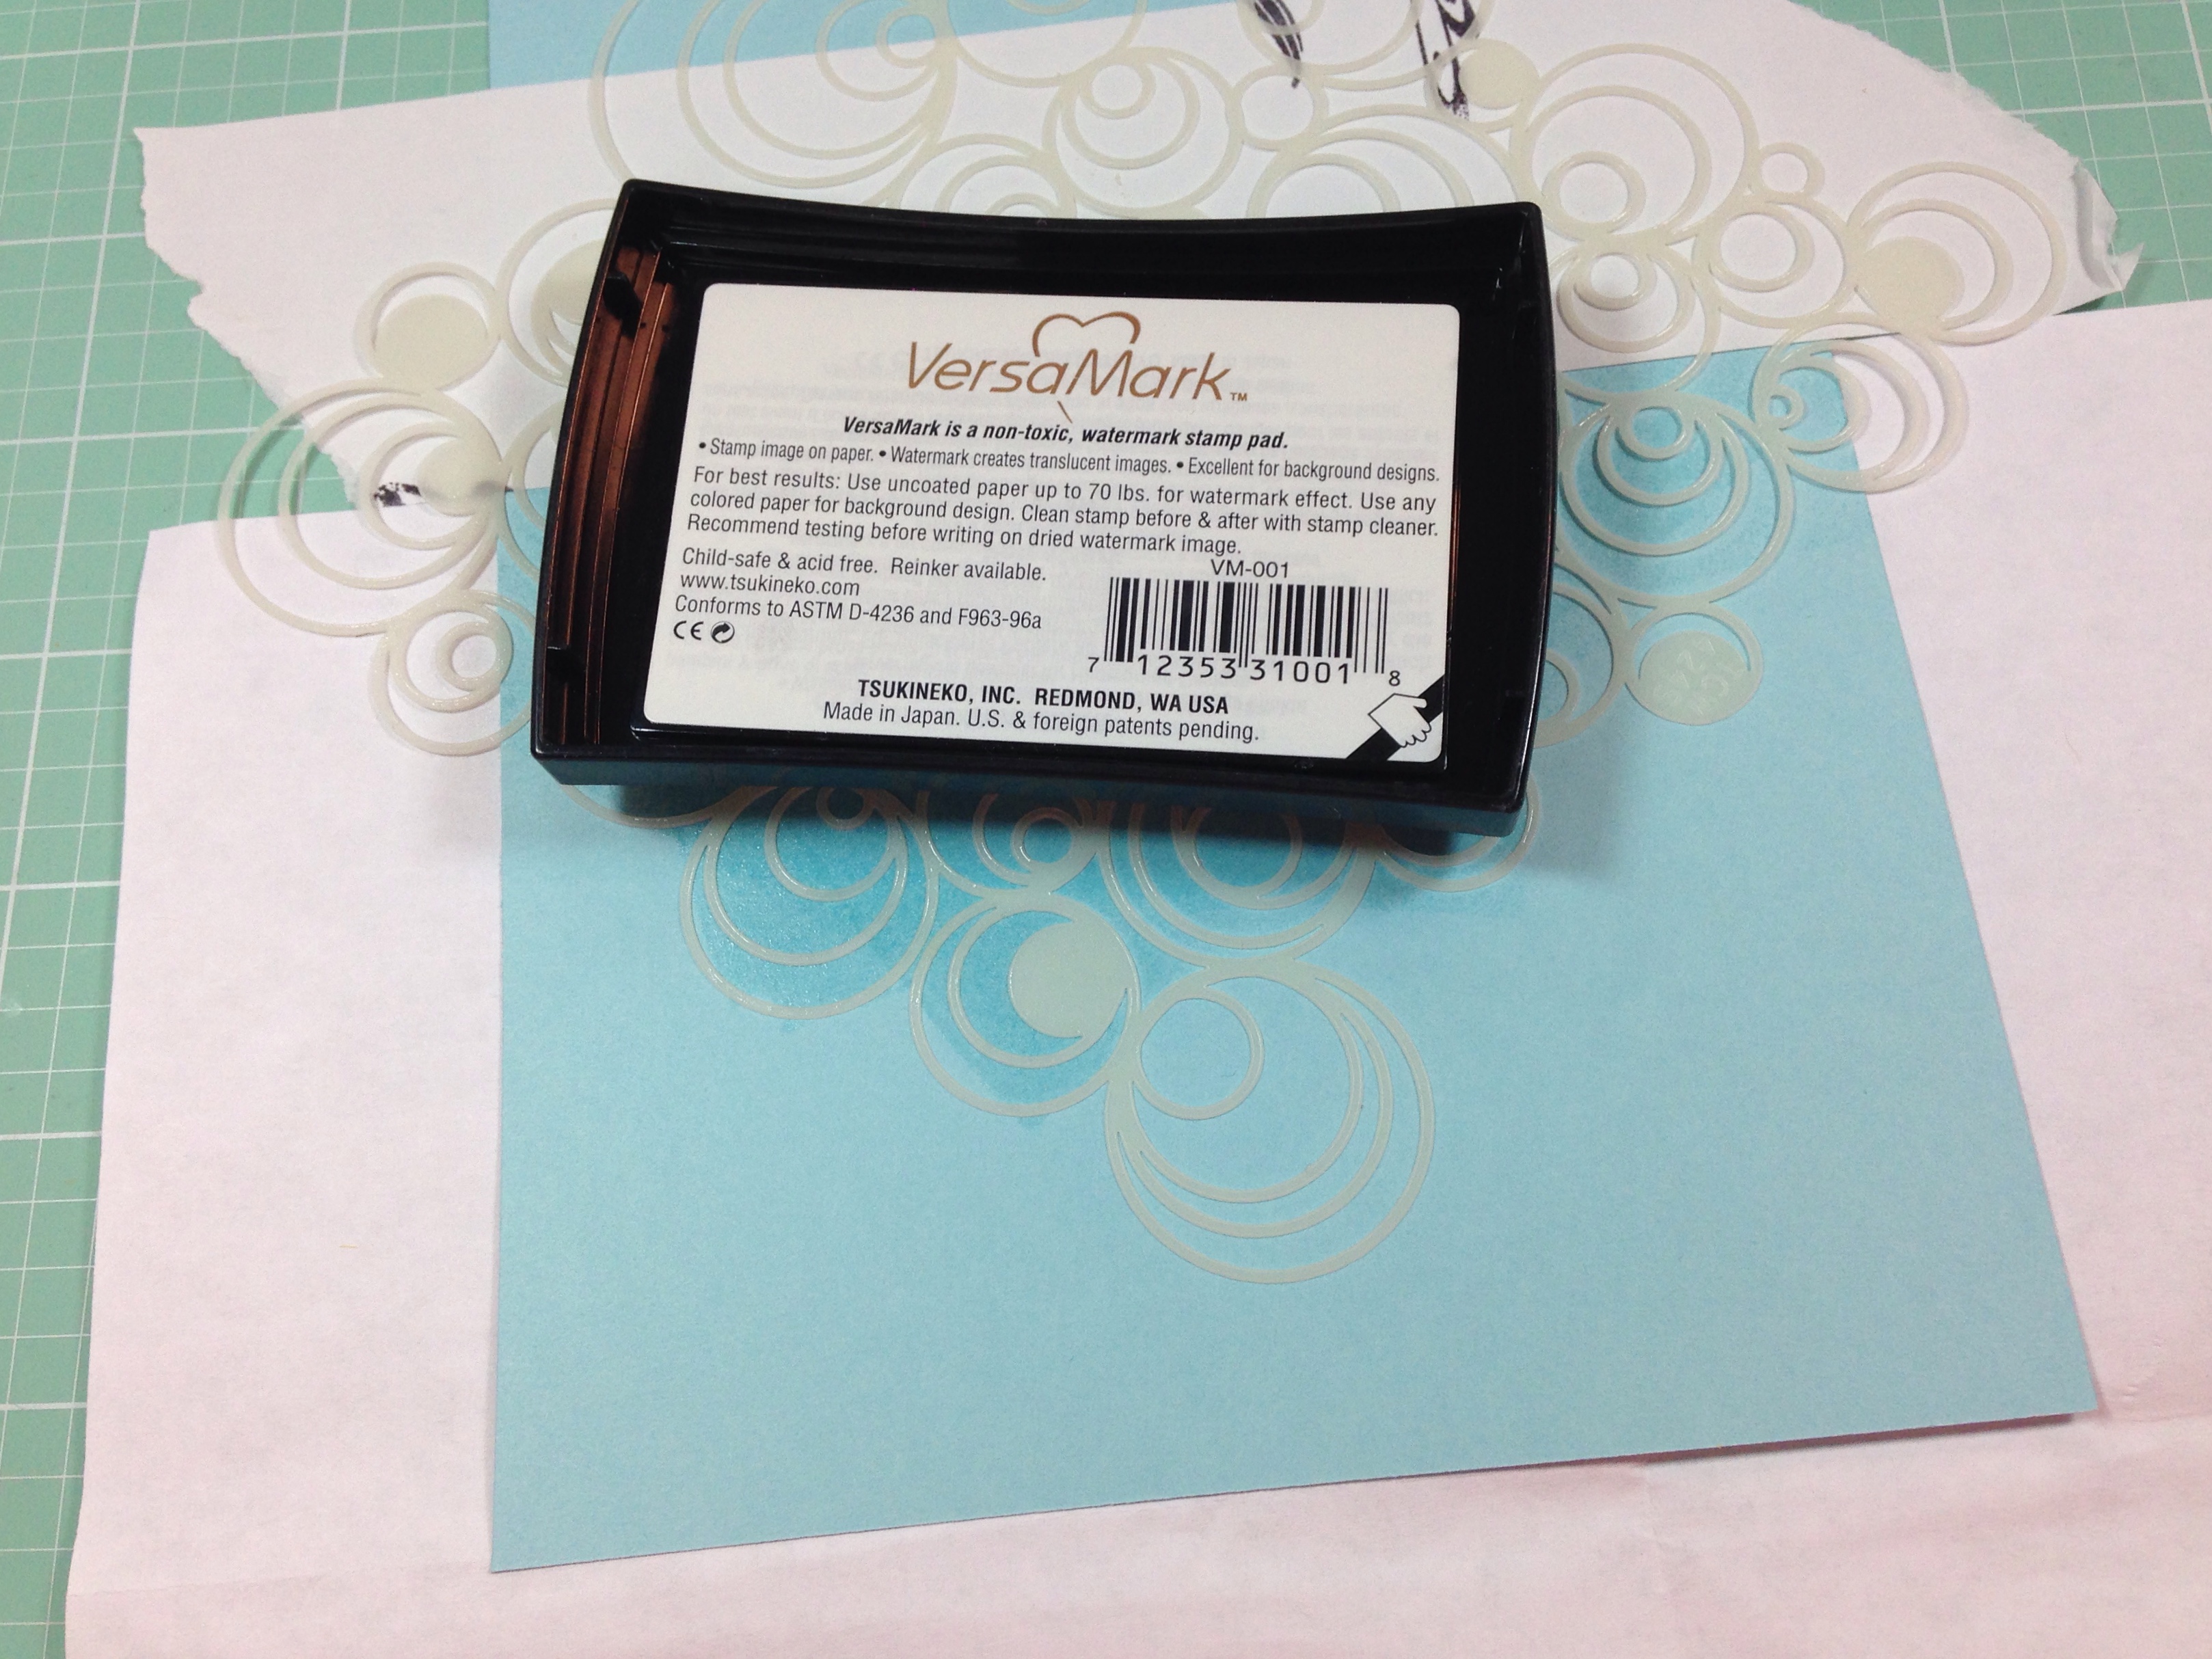
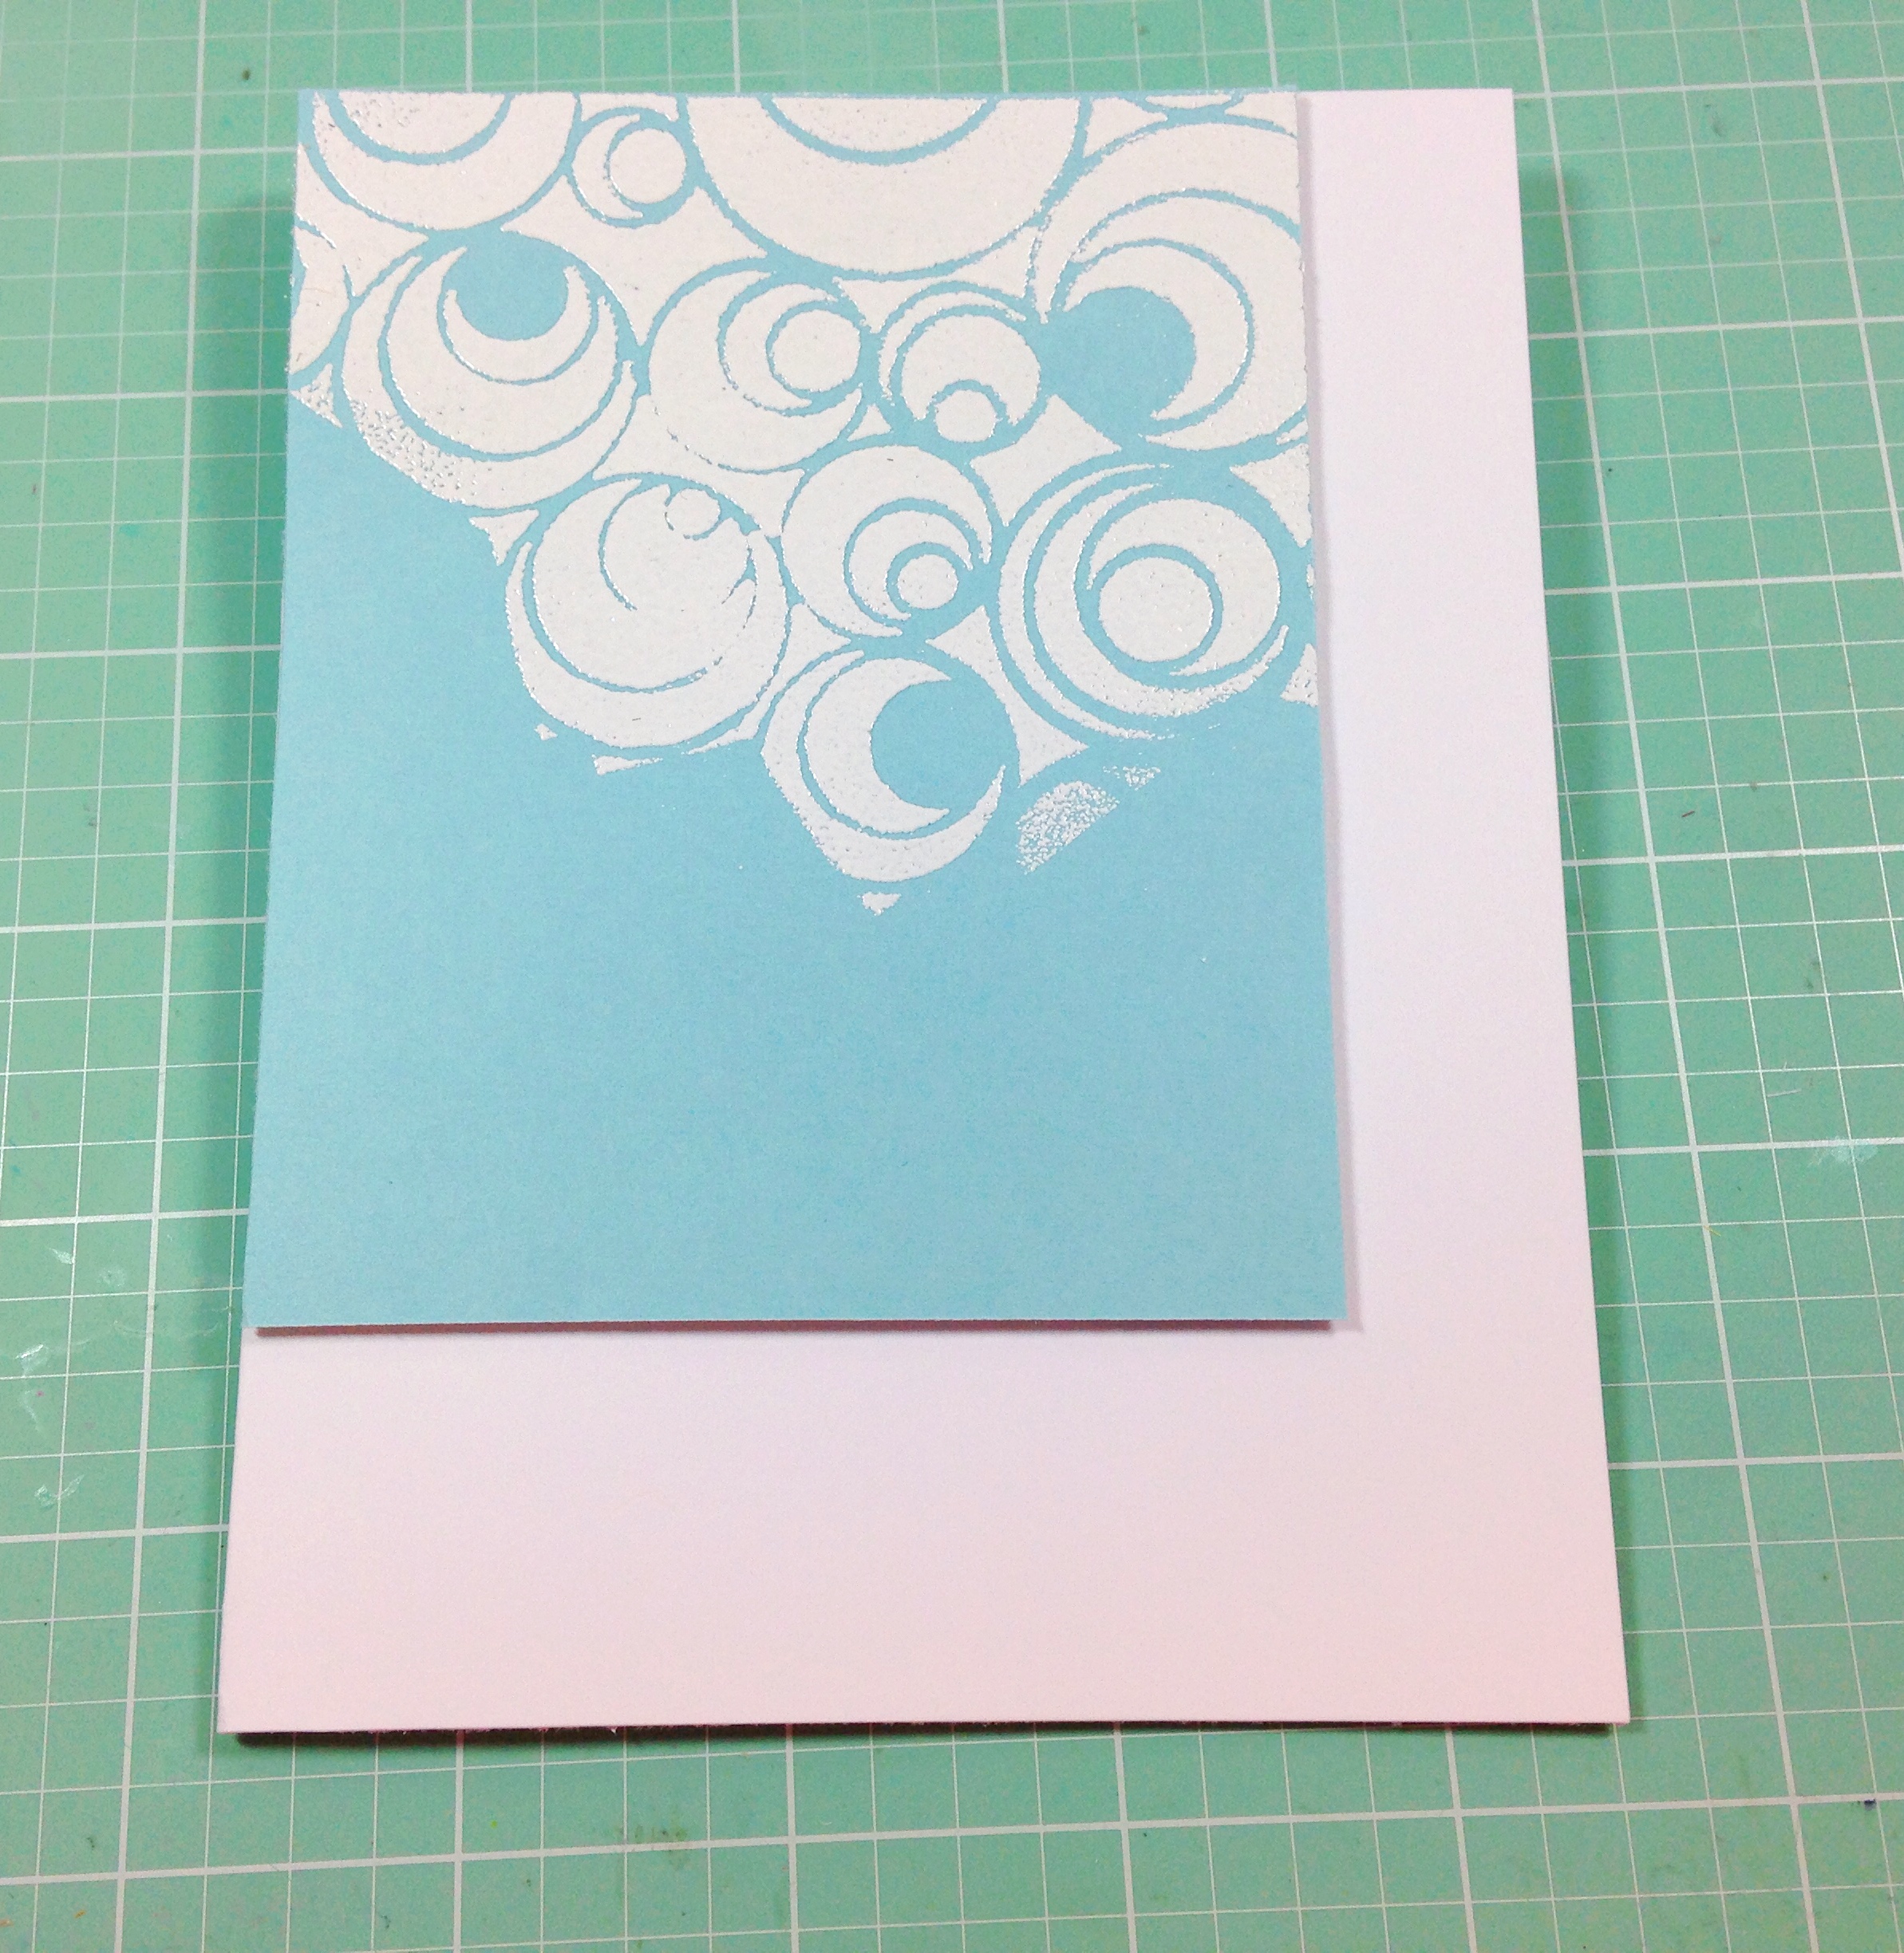
I began by heat embossing the outline vase stamps in white and then adding different patterns from the Retro Backgrounds stamp set from Sweet Stamp Shop (retired) and heat embossing those in white.

IMG_5533

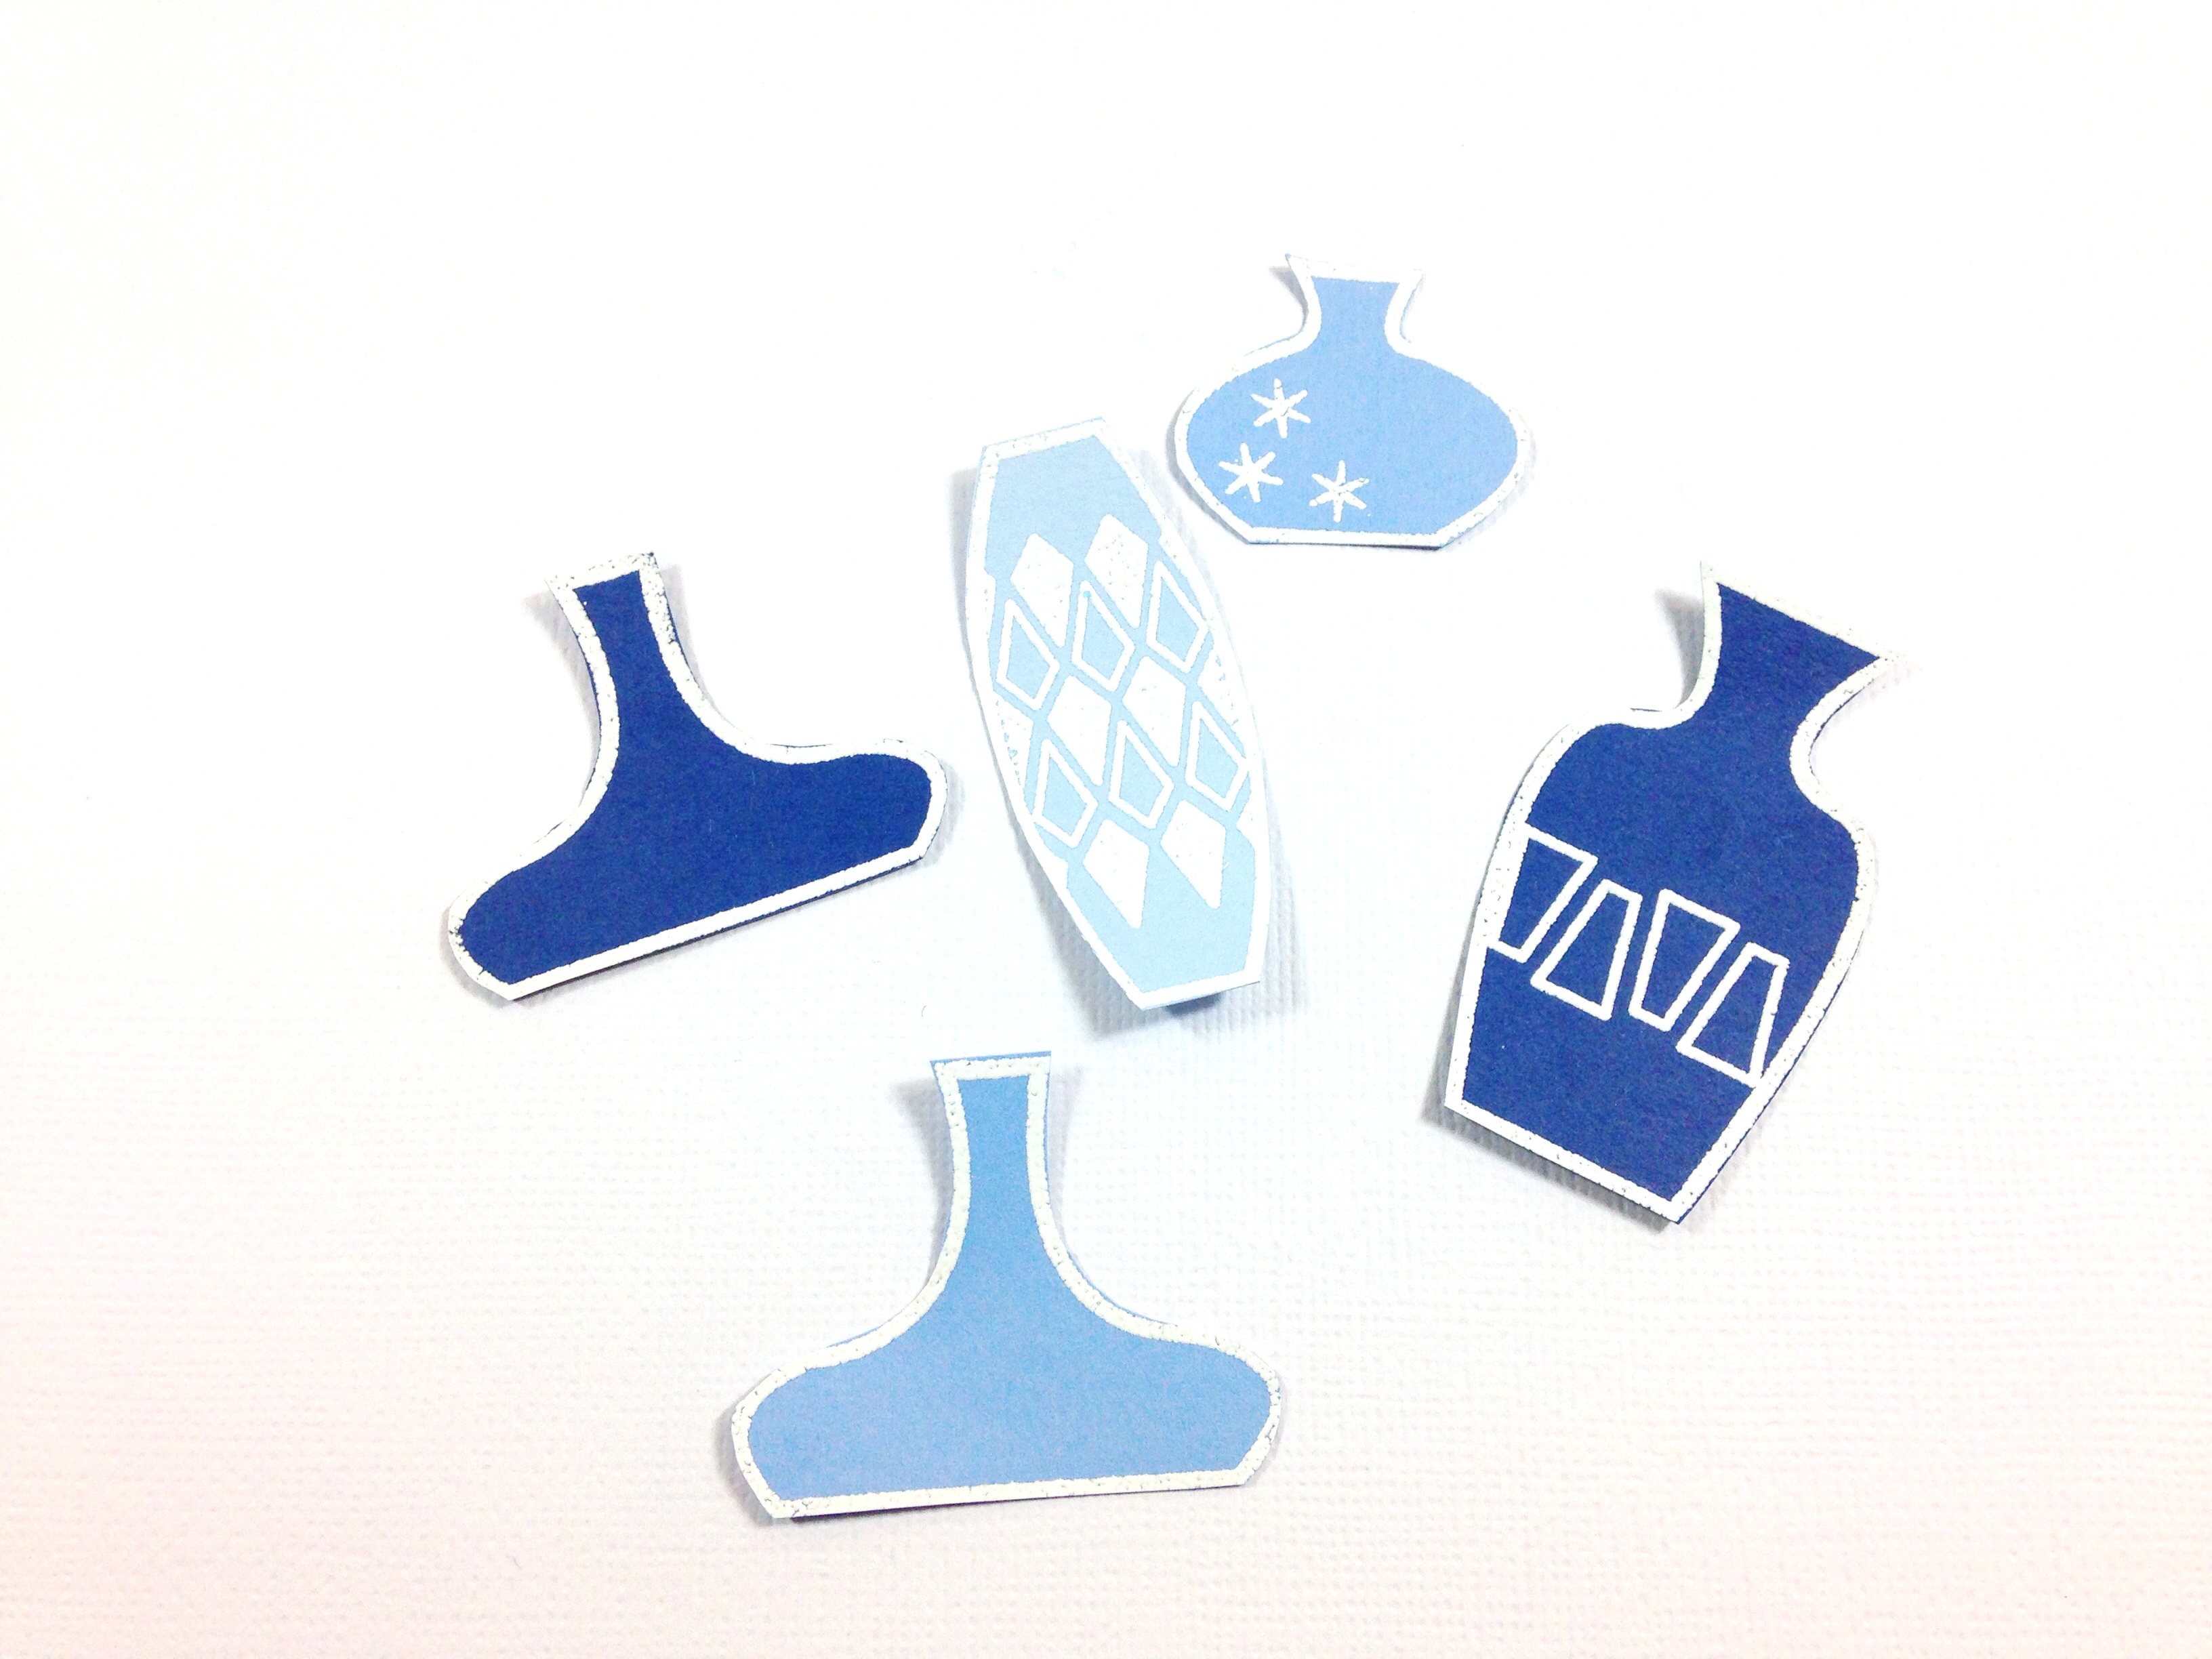
I trimmed out the vases and then got to work on a simple background for them to sit on.

IMG_5535

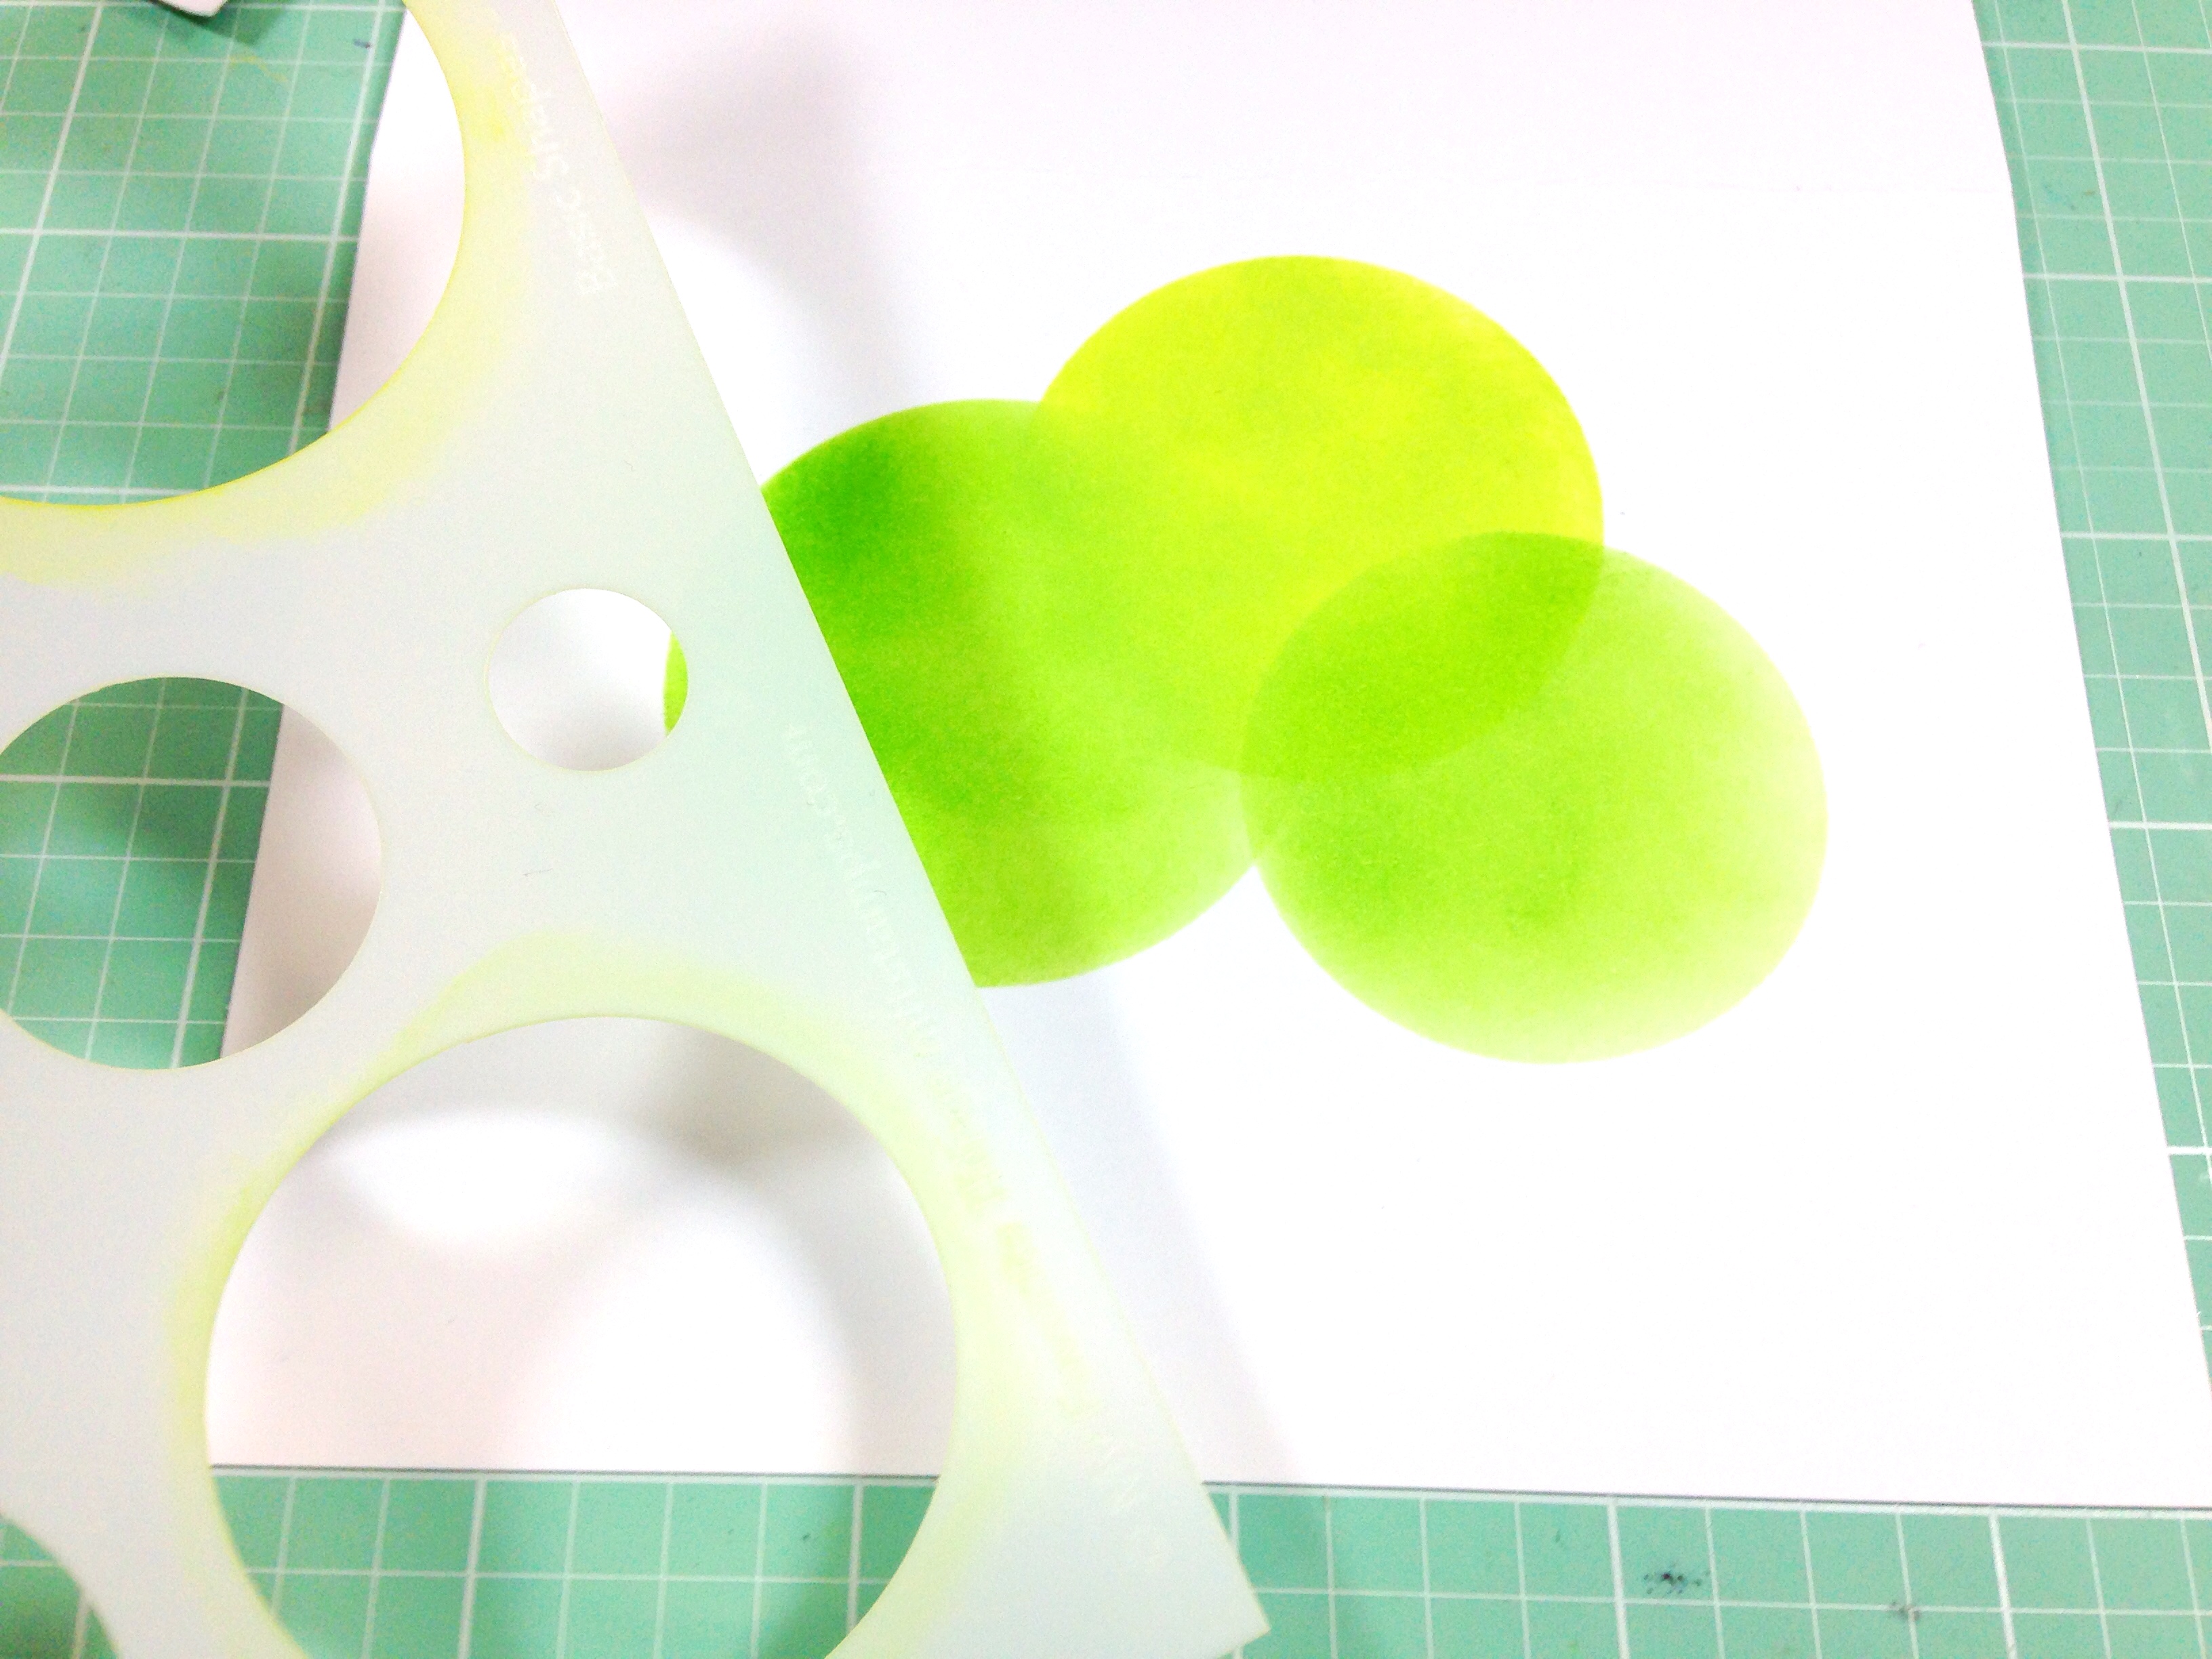
I used a circle stencil from My Favorite Things along with Distress Oxide ink in Mowed Lawn and Twisted Citron to blend a few circles onto a note card I made with Cougar White Super Smooth 110# card stock.

cc vases 3

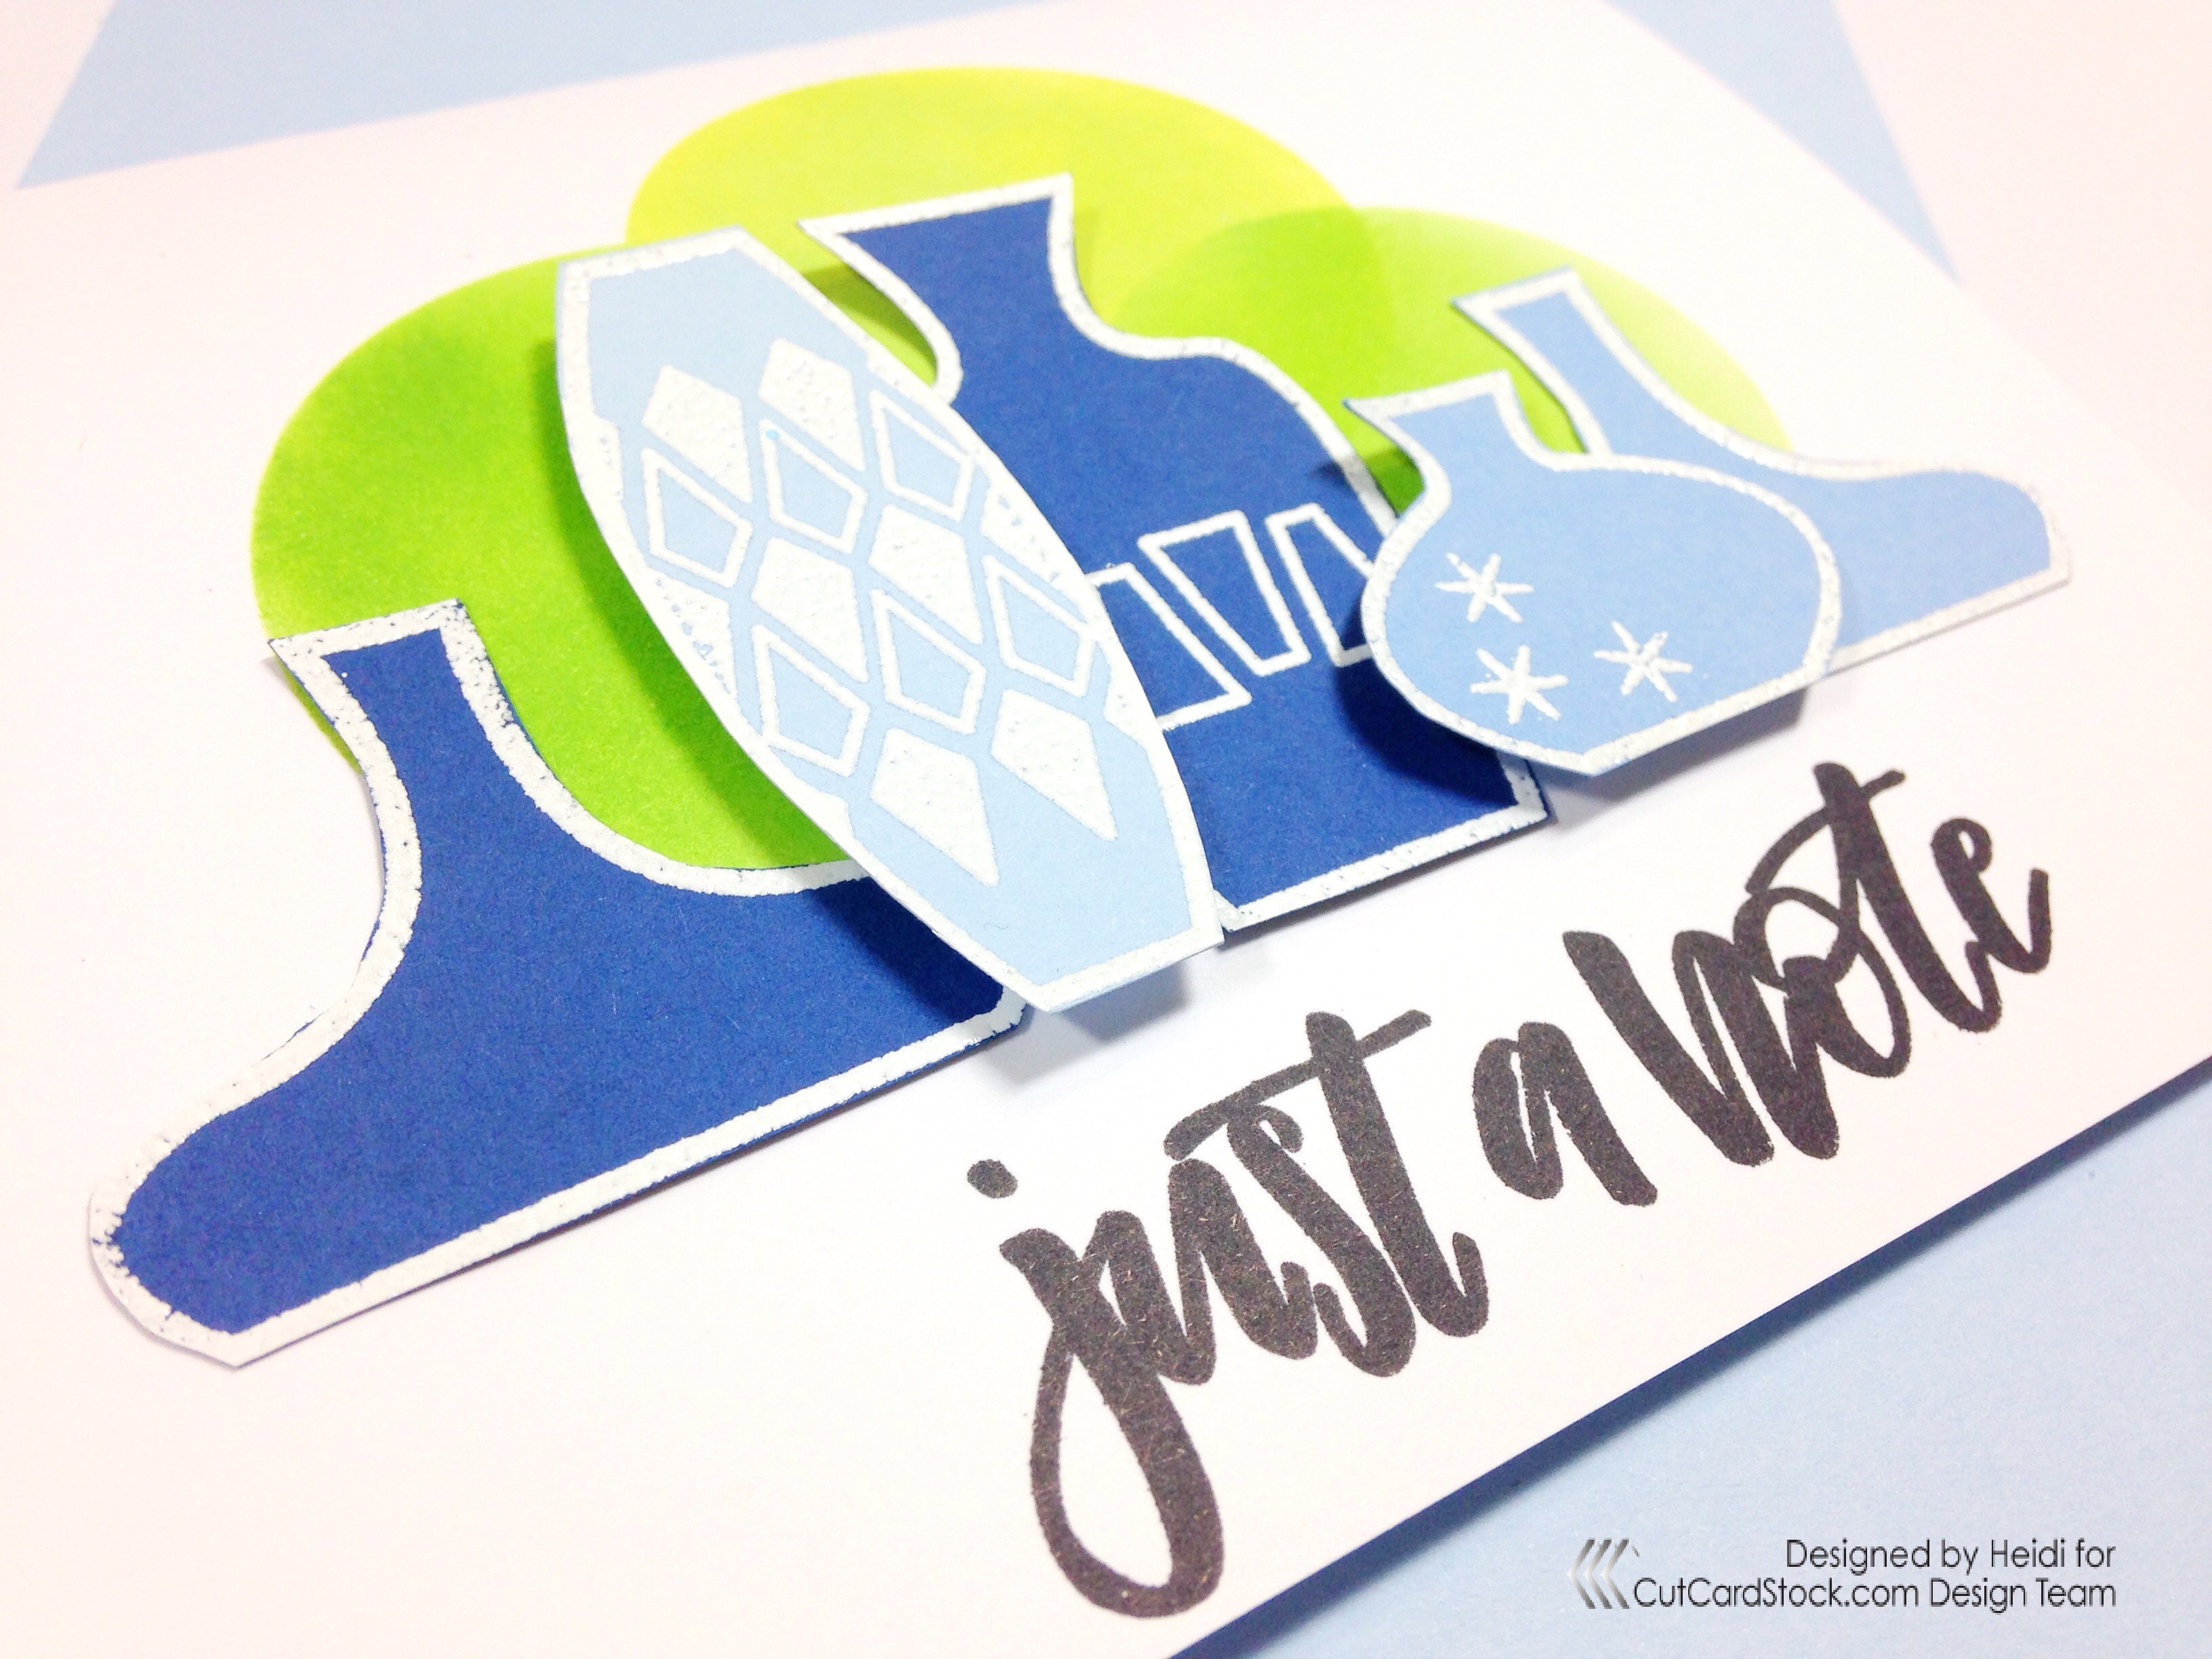
I adhered the vases over the top of the bright green circles using a tape runner and foam squares and finished with a sentiment along the bottom.

cc vases

I love the pop of green against the blue vases and of course, those funky retro accents.  Thanks so much for joining me today!

—SUPPLIES—

The following list contains affiliate links which means if you click on a product link, and make a purchase, I may receive a small commission at no cost to you.  My full disclosure policy can be found HERE).  Some products are linked to multiple shops.  Click on the logo below each product image to be taken to your preferred shop.  


Retro-Style Christmas Tag Toppers

IMG_2502

I’m over at the ThinkCrafts blog today with some fun ideas for decorating your gift tags.  Pre-made die cuts make it even easier.  Head over to the blog to see how these festive tags came together.

—SUPPLIES—

The following list contains affiliate links which means if you click on a product link, and make a purchase, I may receive a small commission at no cost to you.  My full disclosure policy can be found HERE.)  Some products are linked to multiple shops.  Click on the logo below each product image to be taken to your preferred shop.

CutCardstock Design Team Project: Good Vibes

I cannot resist “retro style” typography.  When it’s a shadowed die cut–even better!  Today’s card, first featured over at the the CutCardstock blog, has all that and a layer of stenciled embossing– another favorite :).  The star of the show however is the gorgeous silver and gold card stock from the CutCardstock shop.  Pow Silver Glitter paper and Currency Cover Gold card stock.

IMG_0914

I glued my word die cuts together using some strong Tombow glue.  I made two versions of the die cut and settled on the gold on top of the glitter.  I’ll save the other for another project.

IMG_0916

IMG_0918

Next, I took a 4.25″ x 5.5″ panel of Pop Tone card stock in Berrylicious and a stencil with some retro circles and ran VersaMark ink over the top of the stencil.  I then heat embossed opaque white embossing powder over the top.

IMG_0920

I trimmed down the panel and adhered it to the front of a note card using foam tape.   I made the white card using Cougar White Super Smooth card stock in 100#.  The stencil was a little difficult to heat emboss perfectly because it did not have a border, but the die cut will cover that up.

IMG_0922

I added some clear gems to mimic the bubbles in the stencil.  This card makes me smile.  The gold and silver card stock pieces give just enough shimmer and shine without overpowering the card.

good vibes 1

good vibes 2

Thanks so much for joining me today!

–SUPPLIES–

Pow Silver Glitter paper 

Currency Cover Gold card stock

Cougar White Super Smooth card stock

PopTone Berrylicious card stock

Simon Says Stamp Good Vibes wafer dies

TCW Mini Mod Spirals stencil

Wow Opaque Bright White embossing powder

 Kat Scrappiness Sparkling Clear Droplets Sample Pack

Tombow Mono Aqua Liquid Glue


Summer Mini Book Using the Carta Bella Summer Splash Scrapbook Kit

Hi Everyone!

I have a super easy project for recording your summer memories over on the CreateForLess blog today.  There’s a video flip-through too!  I’m using products from the Carta Bella Summer Splash scrapbook collection and there’s so much retro goodness!

The following list contains affiliate links which means if you click on a product link, and make a purchase, I may receive a small commission at no cost to you.  My full disclosure policy can be found HERE.)

–SUPPLIES–

 Paper Accents Pocket (4 1/4 x 5 1/2)

paper accents blue pockets 4 1/4 : Paper Accents Pocket Assorted Sizes Blue 8 pc.

Cut Cardstock Design Team Project: Let the Good Times Roll


Retro graphics on cards bring a fun and carefree feel that I love.  I think they work really well for masculine cards too, so for today’s card, which I also featured over on the CutCardstock blog, I brought in some fun retro-style stamps and dies  to pair with  CutCardstock’s Basis Cardstock.

Since the stamp I’m using, features a man driving, I used a wavy die to kind of mimic the look of movement and give a fun, retro feel.

IMG_9985.JPG

I used some Cougar White Super Smooth 100# card stock for my card base and placed the waves across the front overlapping each other.  I cut the waves out using Basic Cardstock in Teal and Blue.

IMG_9969

I used a circle die to cut out my stamped image and place it along the middle of the waves with foam tape.  I did this with the sentiment also.

IMG_9987

I added some stars die cut from Basis Light Yellow and popped them up on foam tape around the circles.

retro 4

retro 2

retro 3

Fun, old-timey style for the guy in your life.  Thanks for joining me today!

–ADDITIONAL SUPPLIES USED–

My Favorite Things: Ride the Wave die

Crafty Secrets:  Favorite Fellas stamp set

Papertrey Ink: Craft Brew stamp set

Kat Scrappiness: Never Ending Circle die set

Paper Smooches: Stars die set